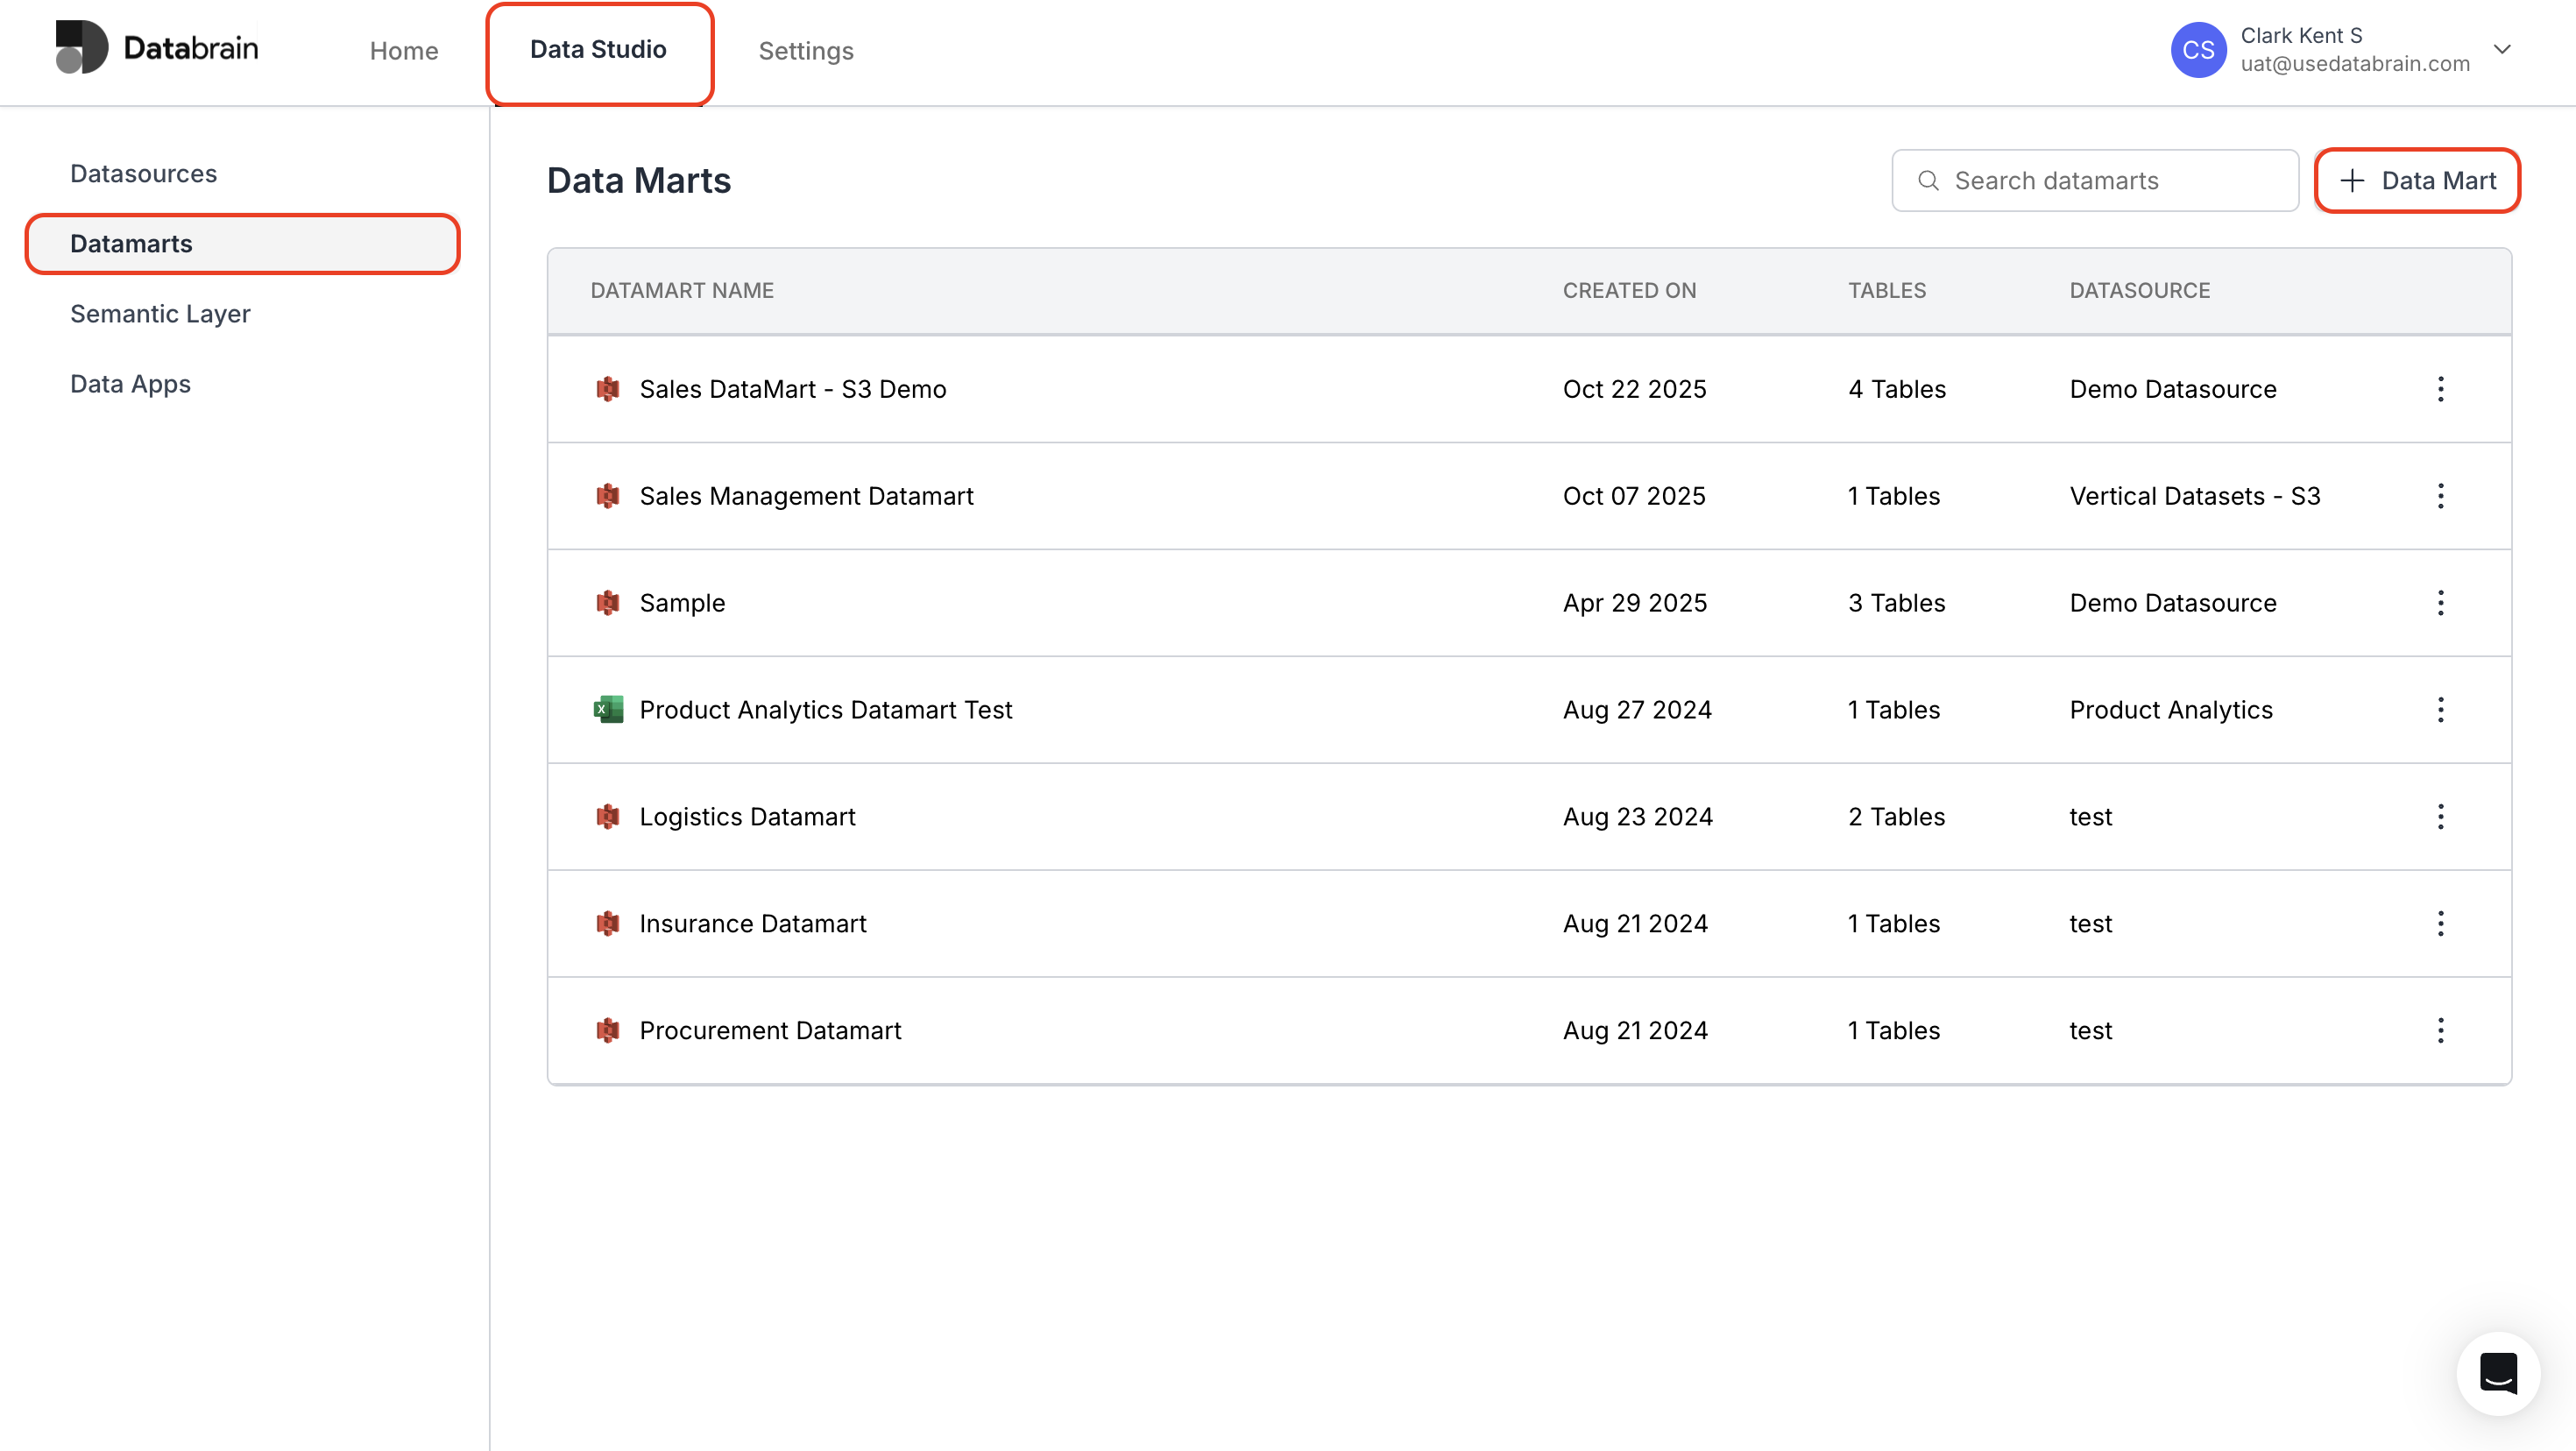
Initial Access
- In the Data Studio page of Databrain, navigate to the Datamarts section.
- Click on the + Data Mart button in the top right corner.
Configure Datamart
- Enter a suitable name for your datamart and choose the corresponding datasource from the dropdown list.
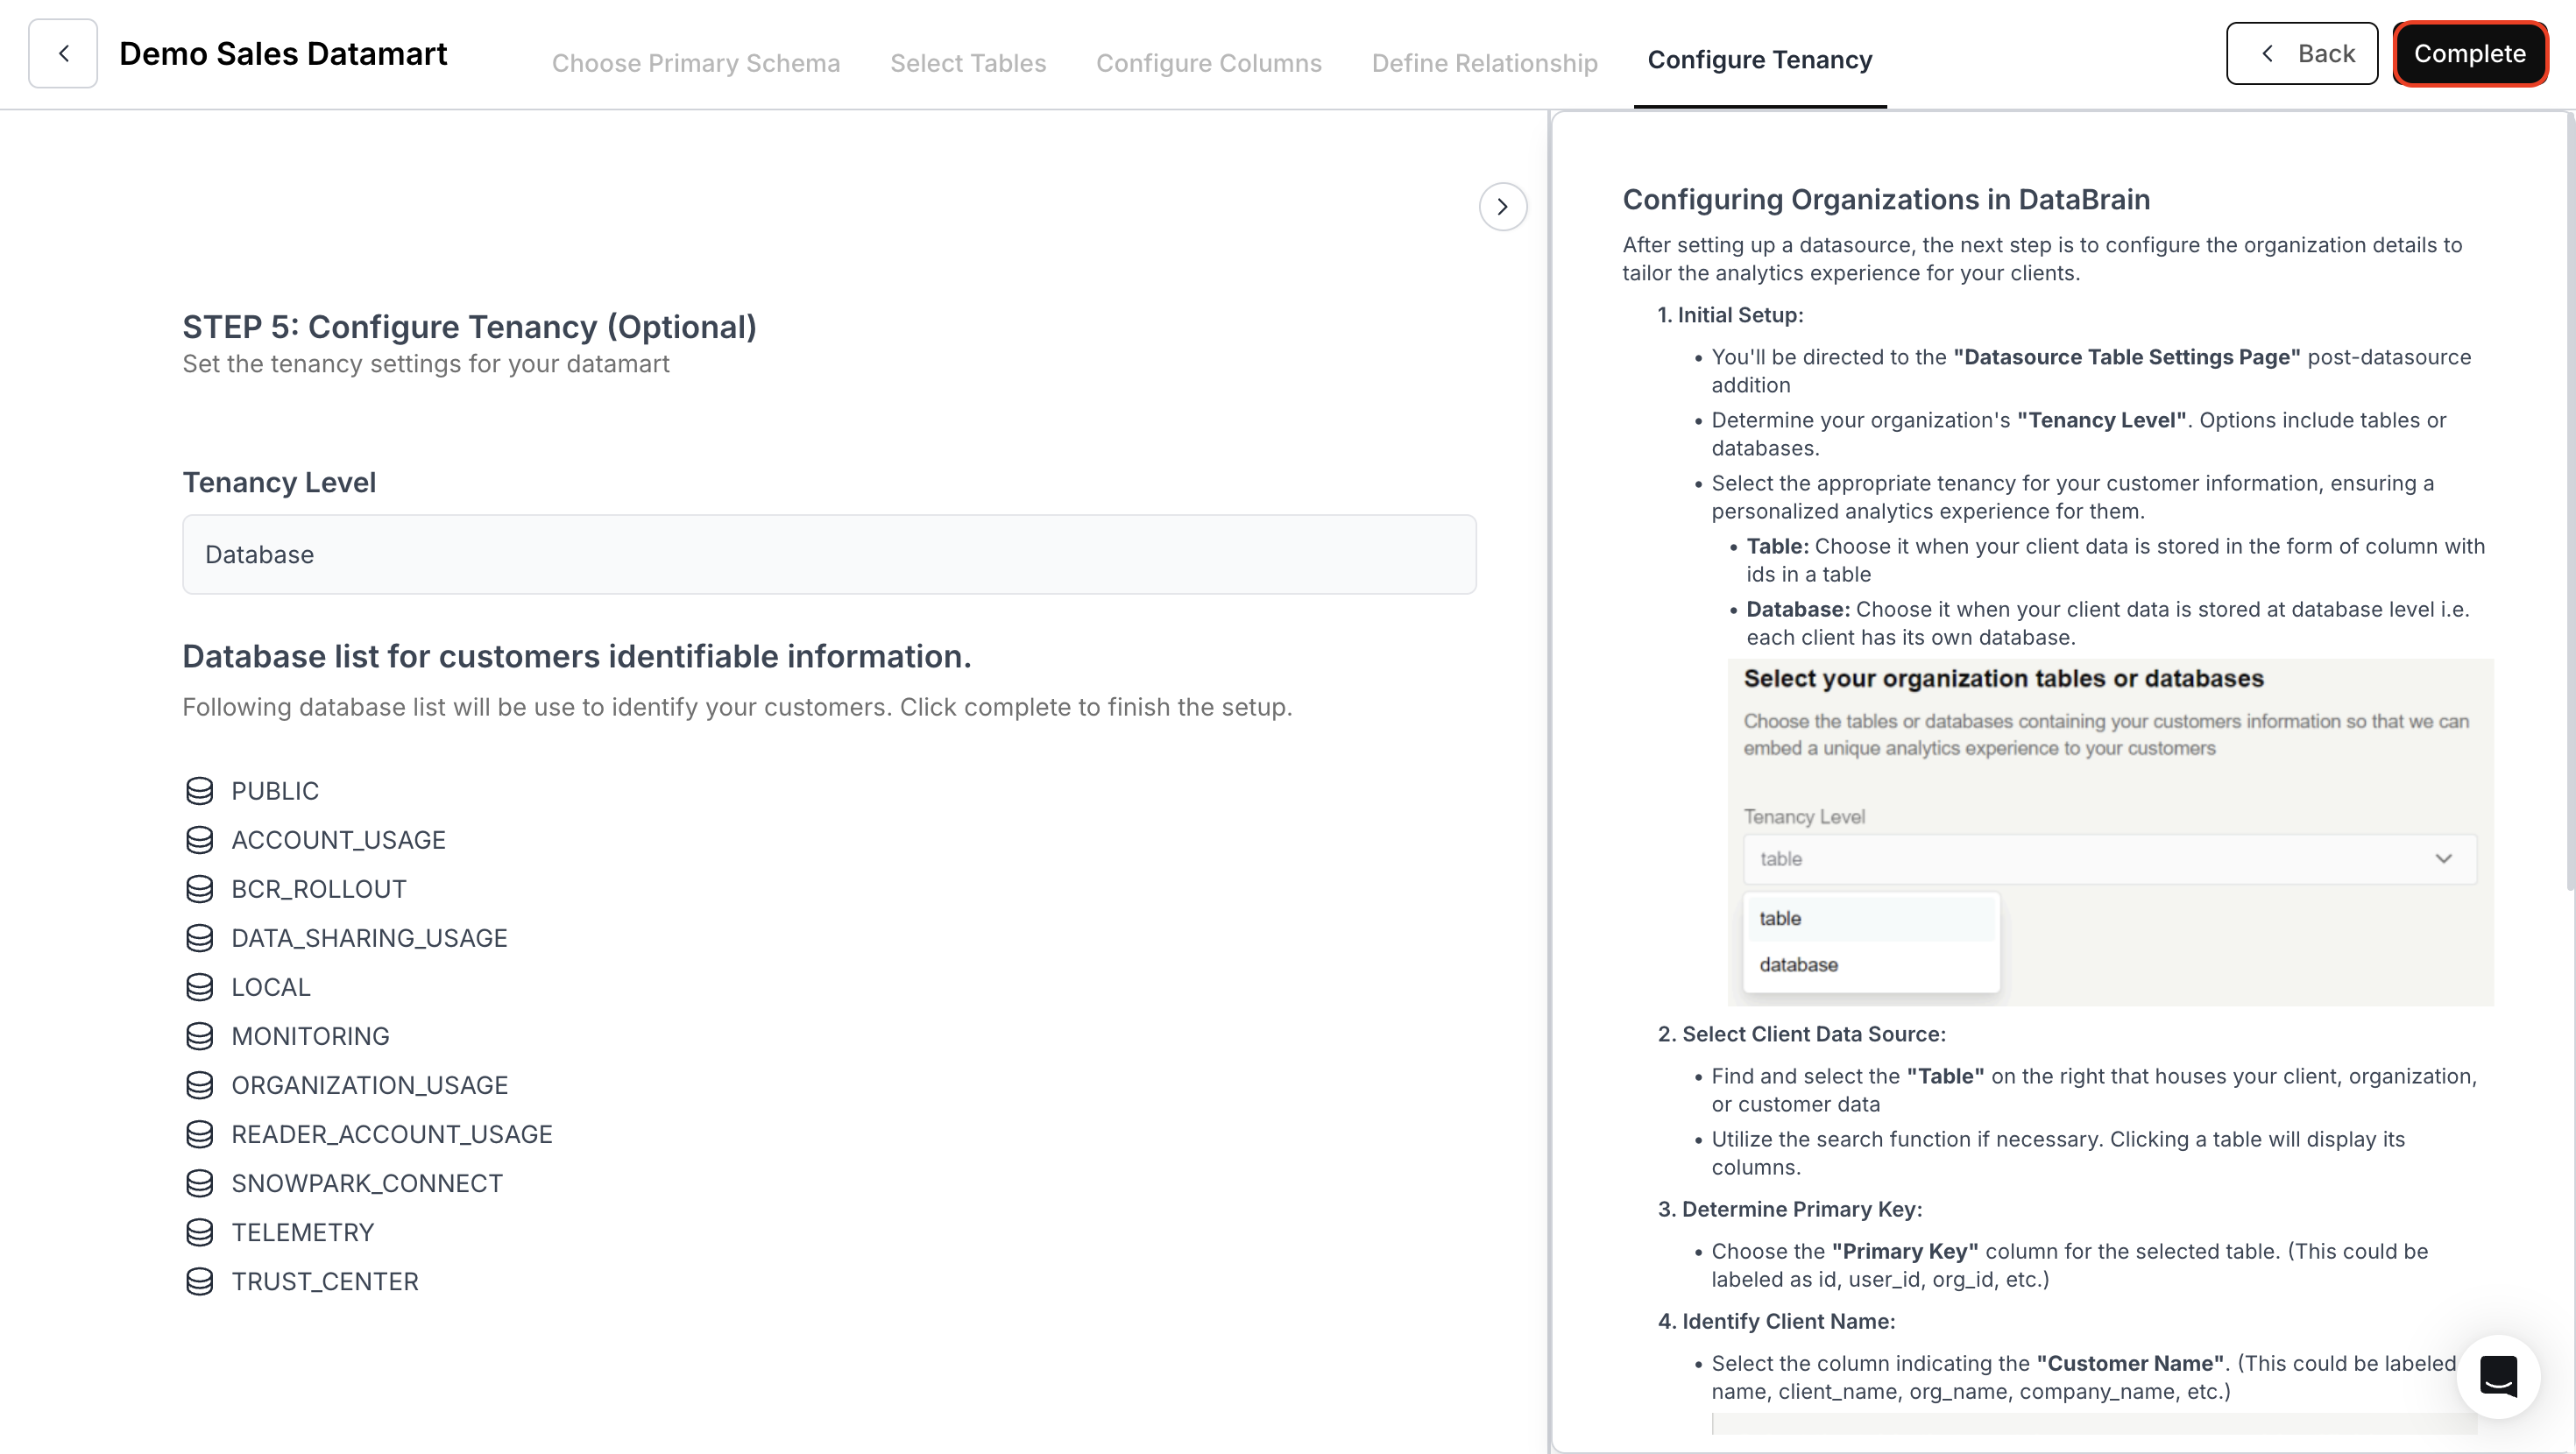
- Choose between:
- Database: Choose this when your client data is stored at the database level (each client has its own database).
- Table: Choose this when your client data is stored as rows identified by an ID column in a single table.
- Click on Next.

Database tenancy refers to organizing and controlling access to data based on specific groups. It ensures that each group can access only their own data, keeping it secure and separate from other.
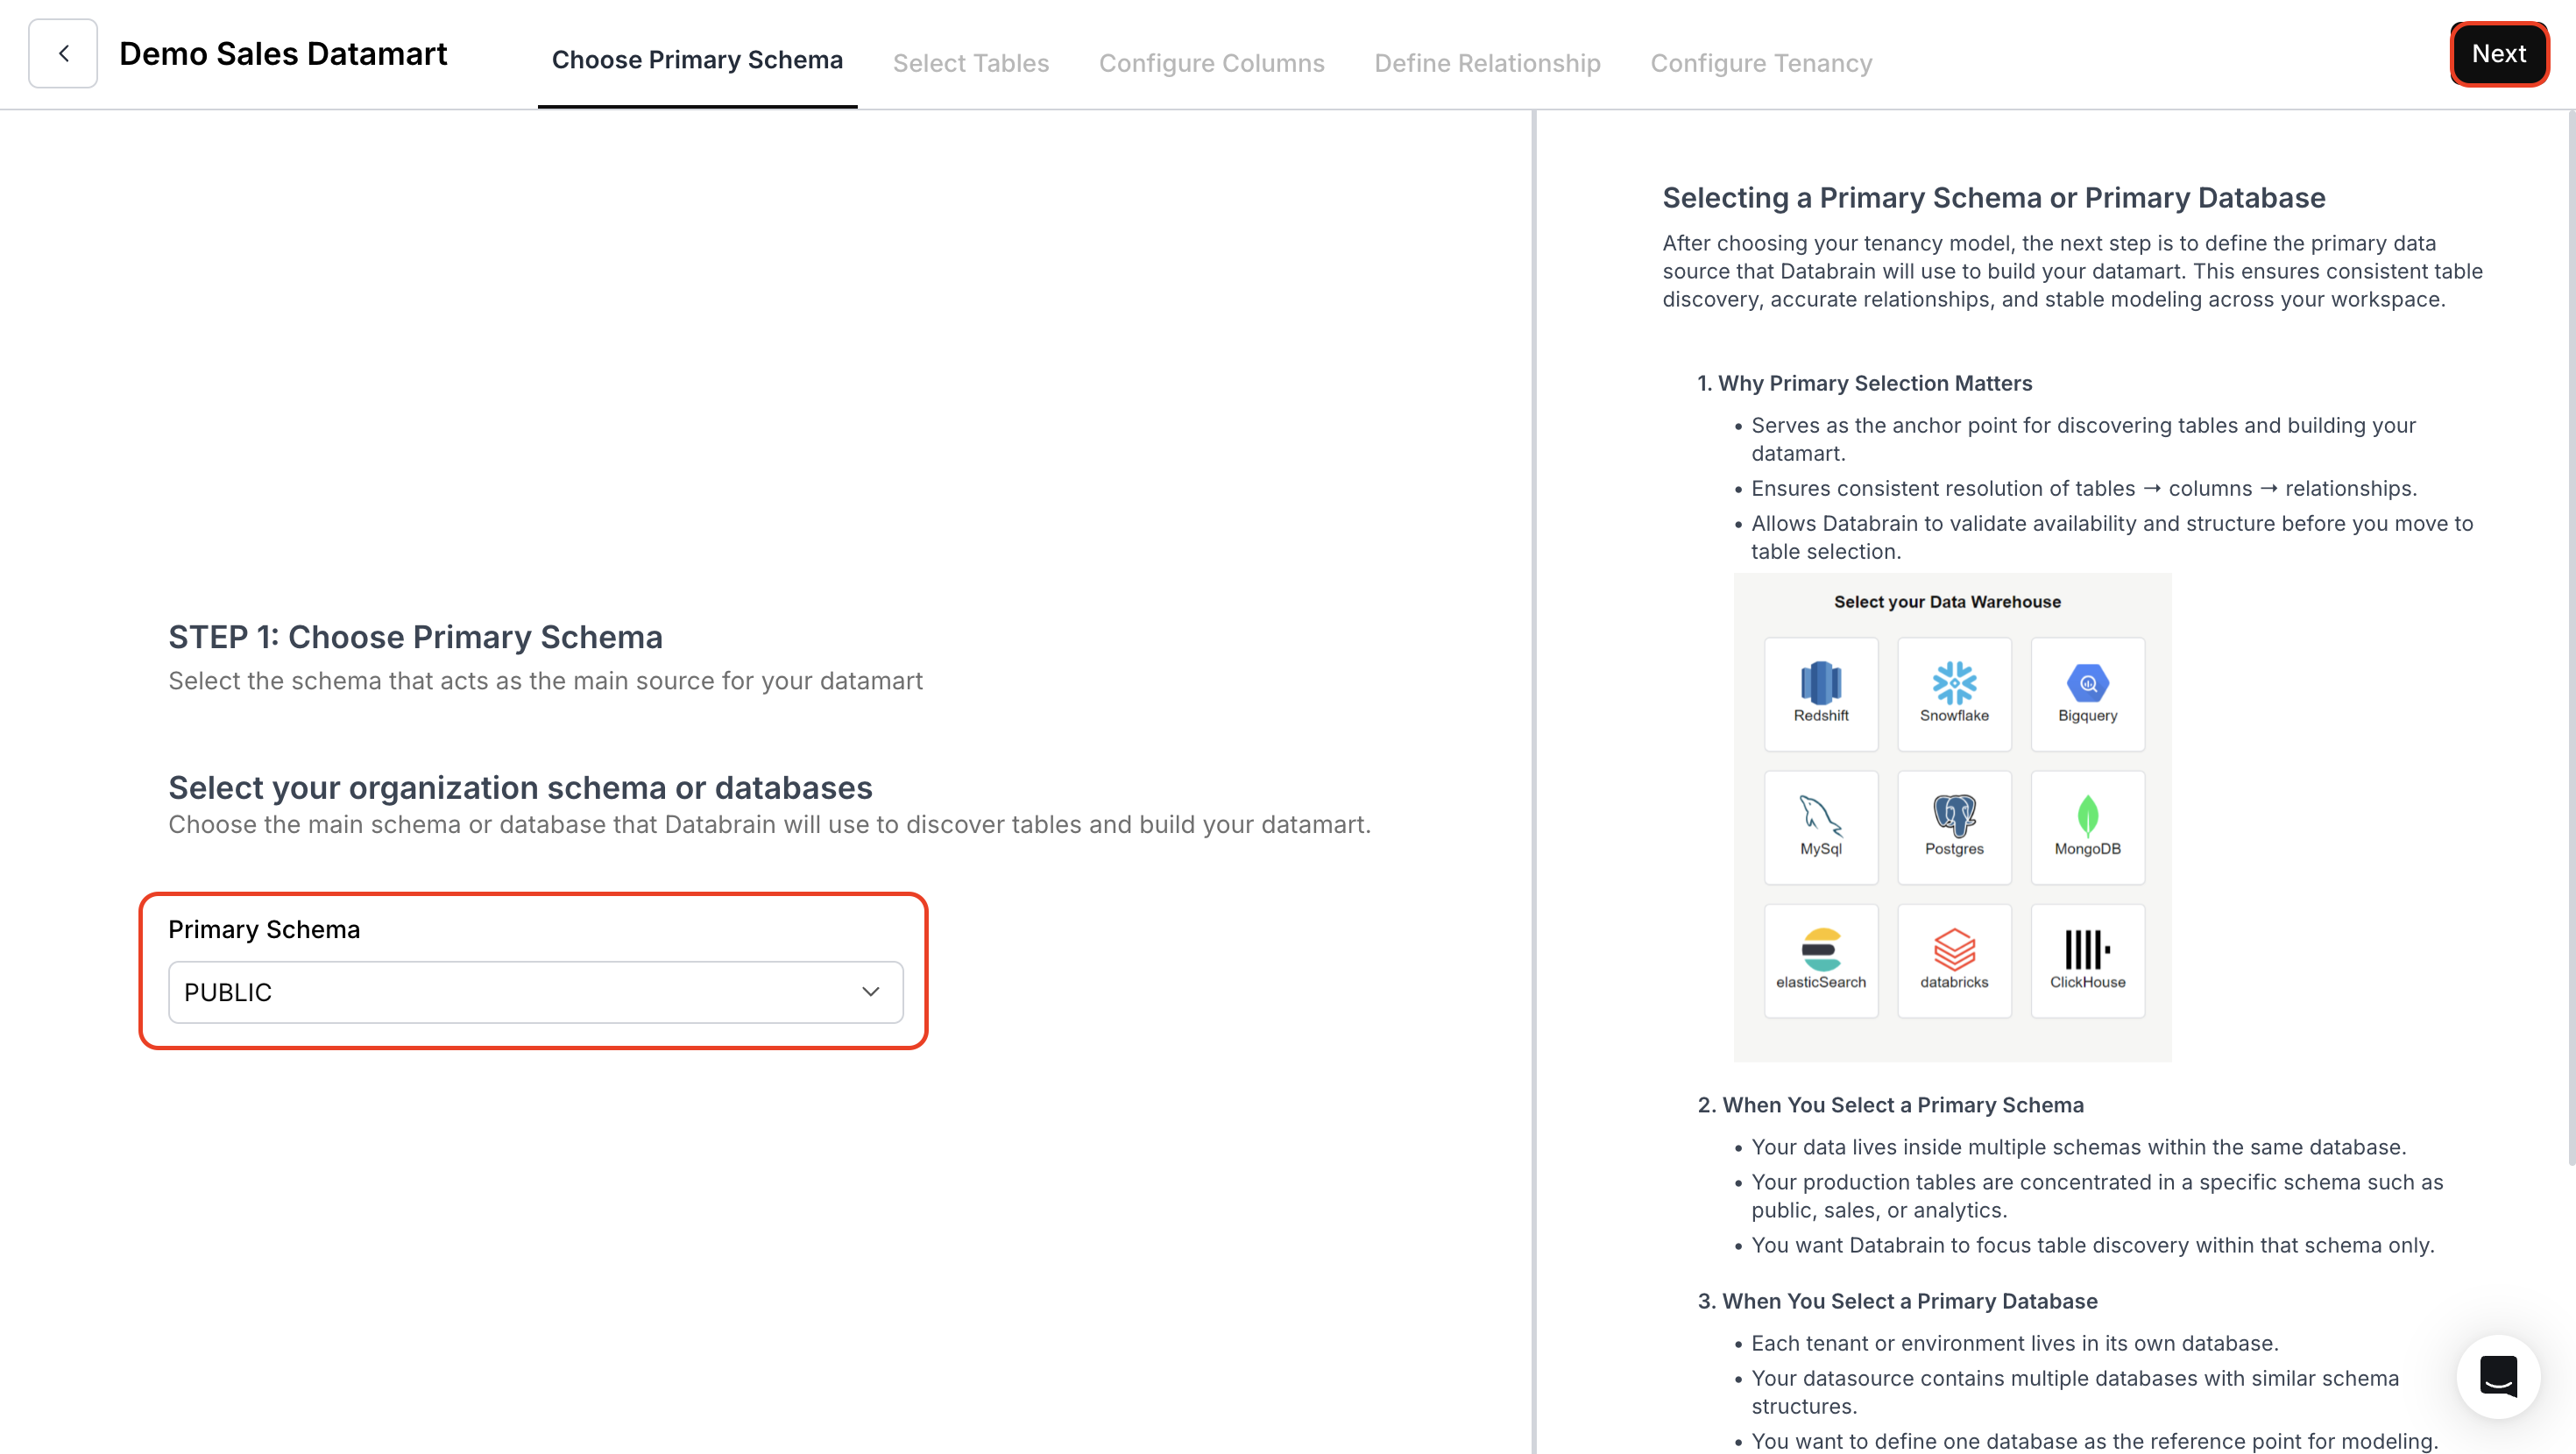
Choose Primary Schema
- Choose the schema that Databrain will use to build your datamart.
- Click on Next.
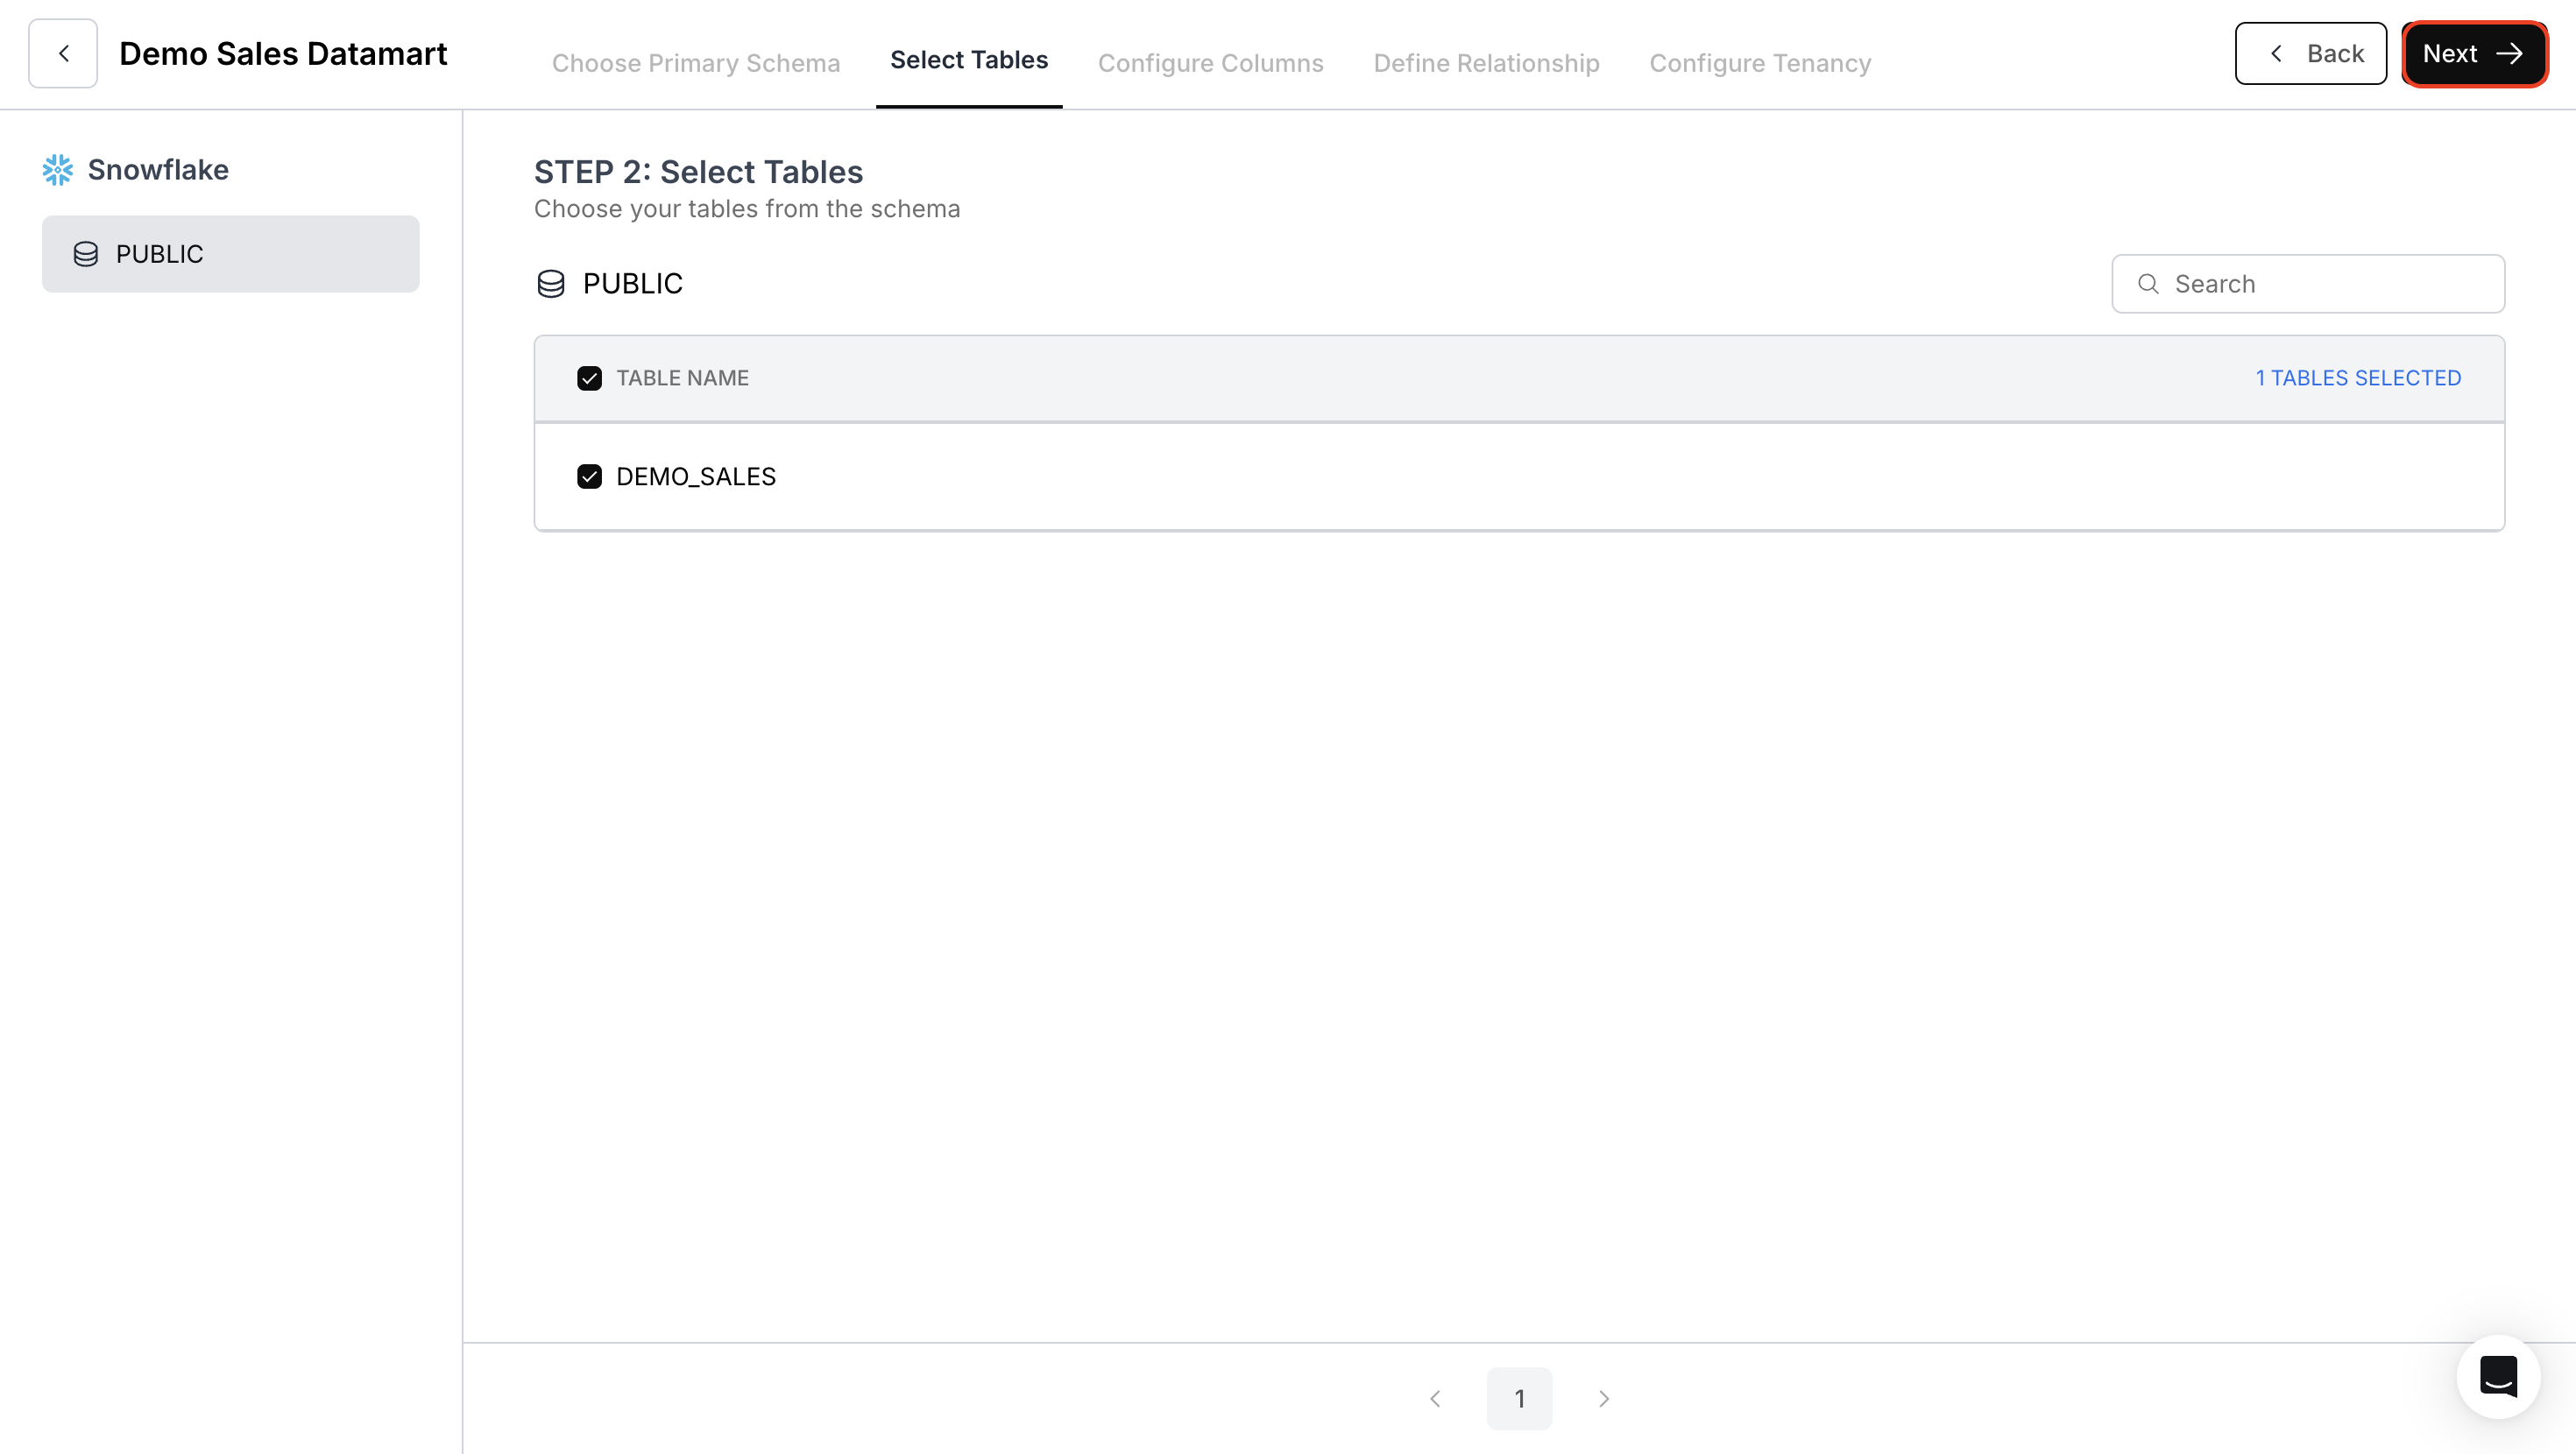
Select Tables
- Use the search box to find specific tables or browse available tables in the schema.
- Select required tables and click Next.
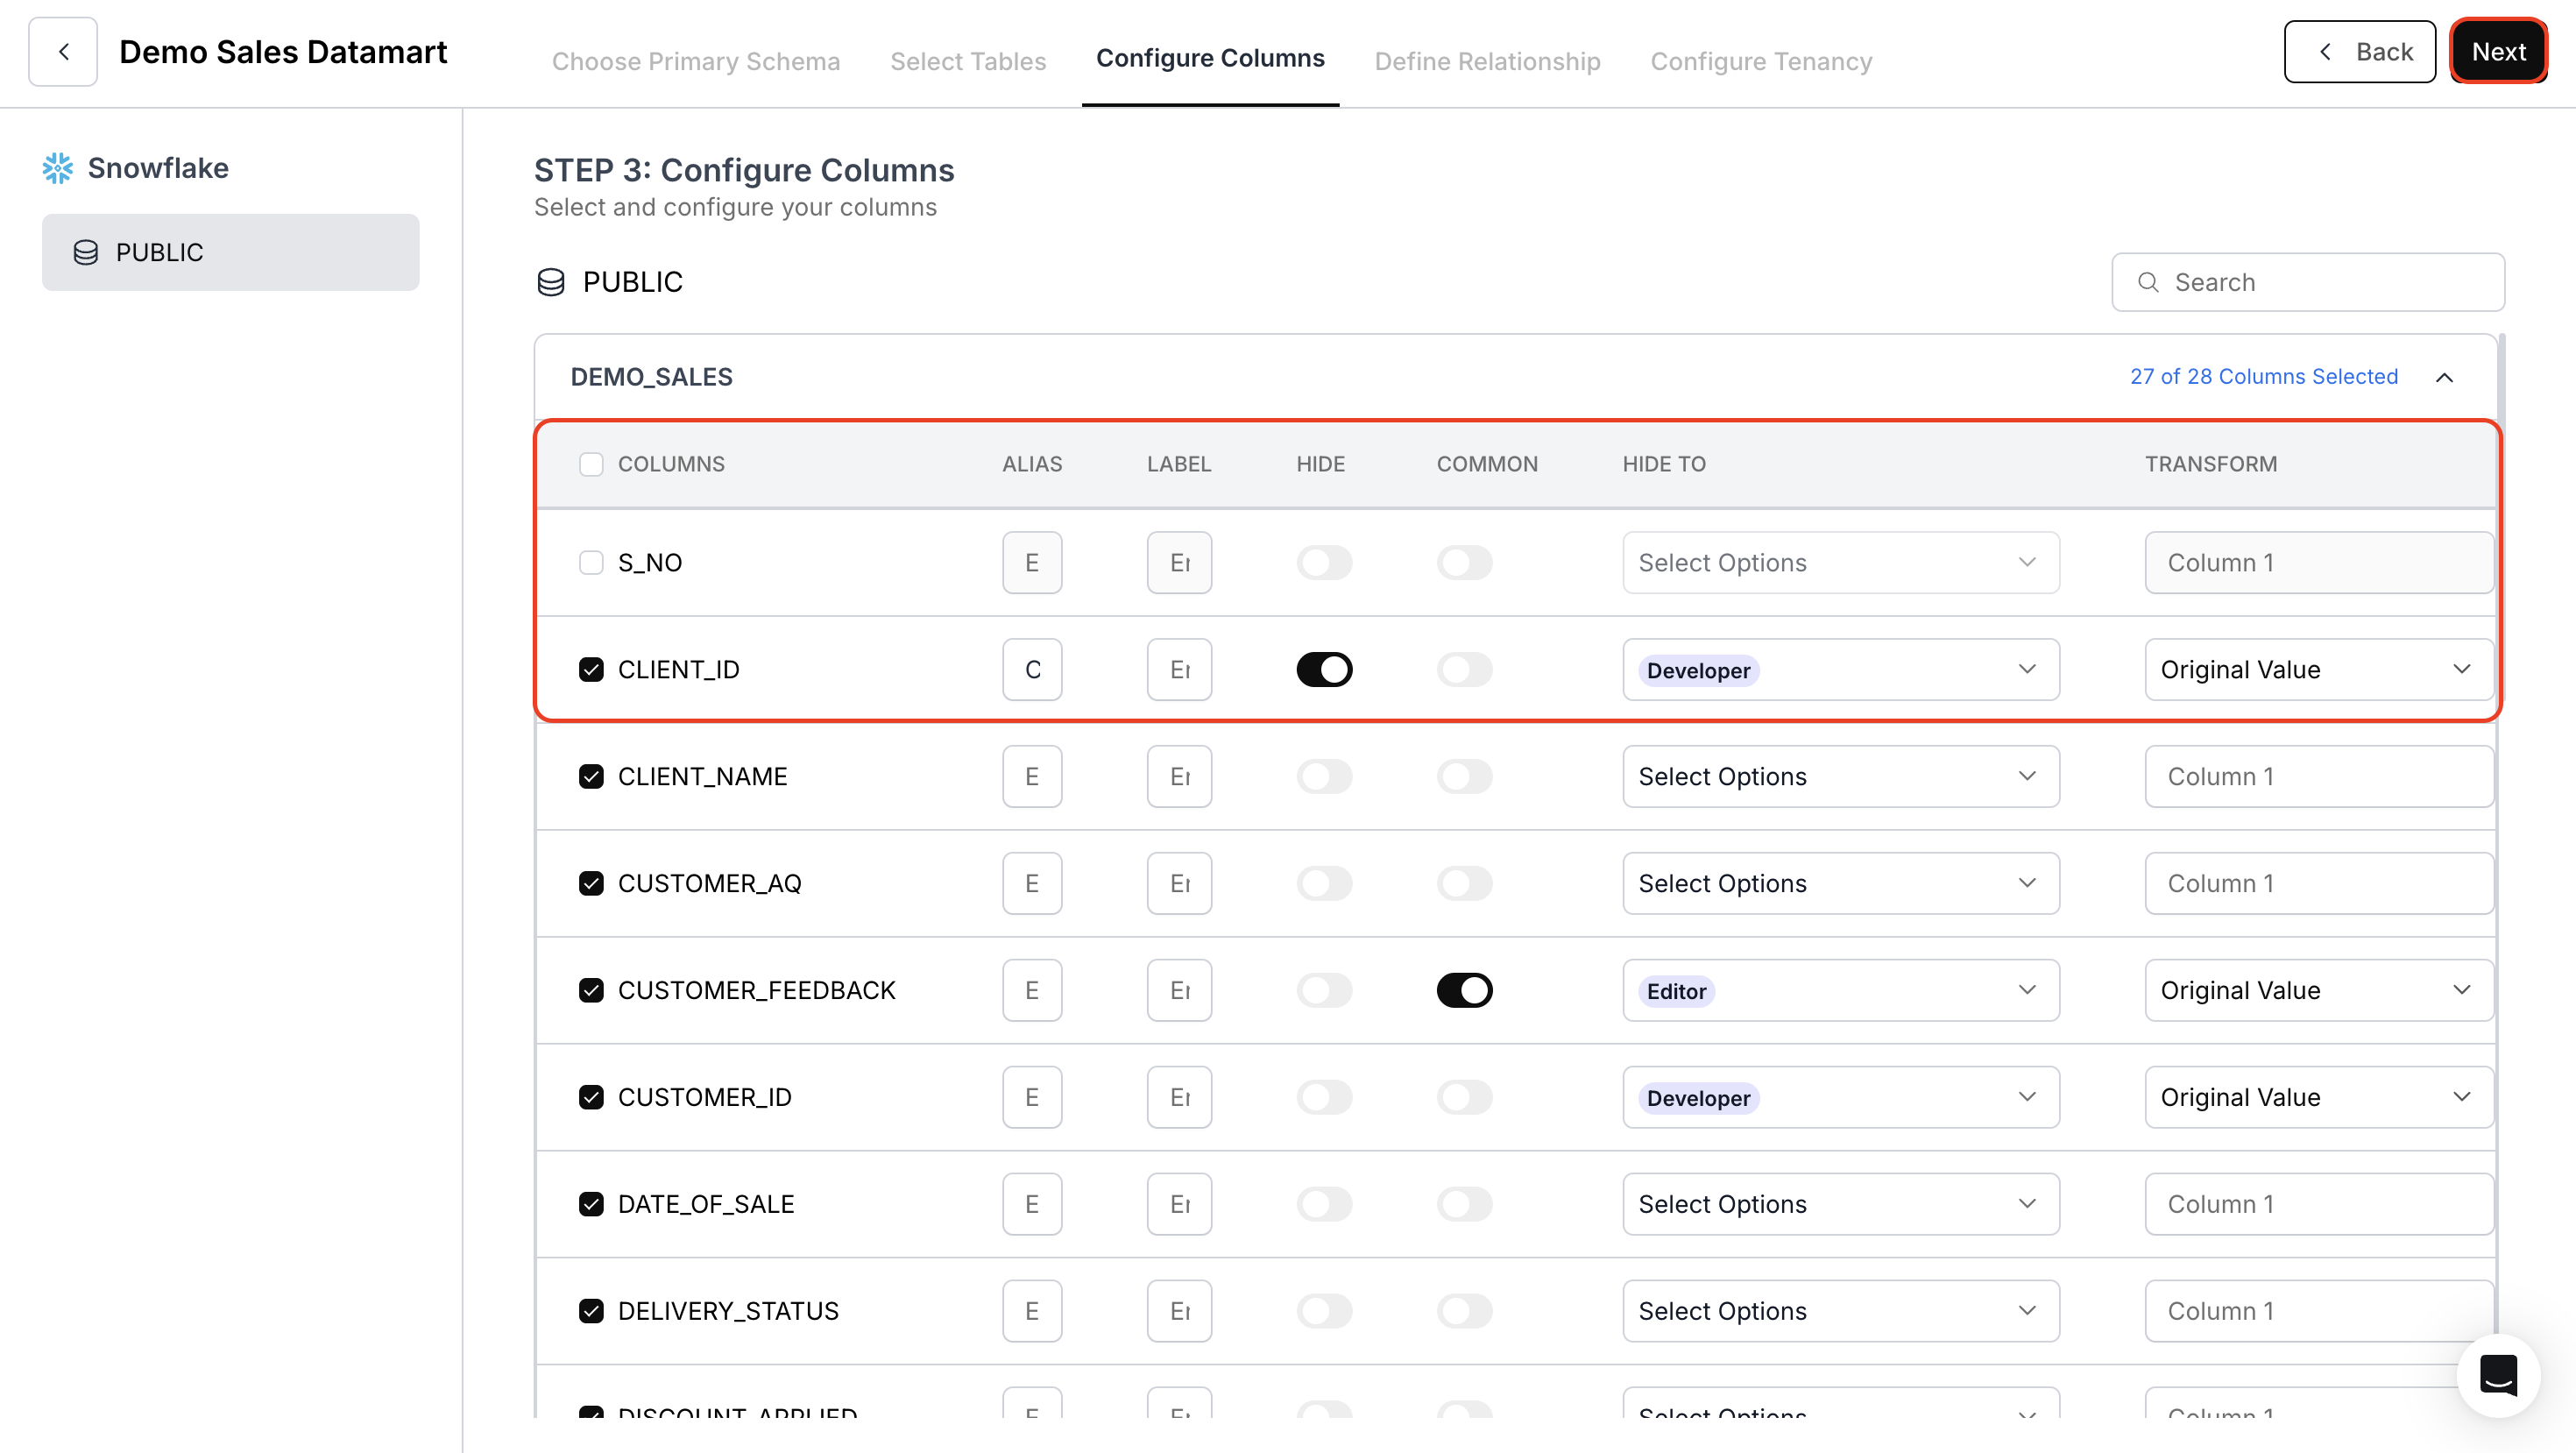
Configure Columns
- For each column, you can configure:
- ALIAS : Create custom names for columns
- LABEL : Create Custom names for end user
- HIDE : Hide the column for end user
- COMMON : Set the column as Common field between databases
- HIDE TO : Set visibility options
- TRANSFORM : Apply data transformations
- Then, click Next.
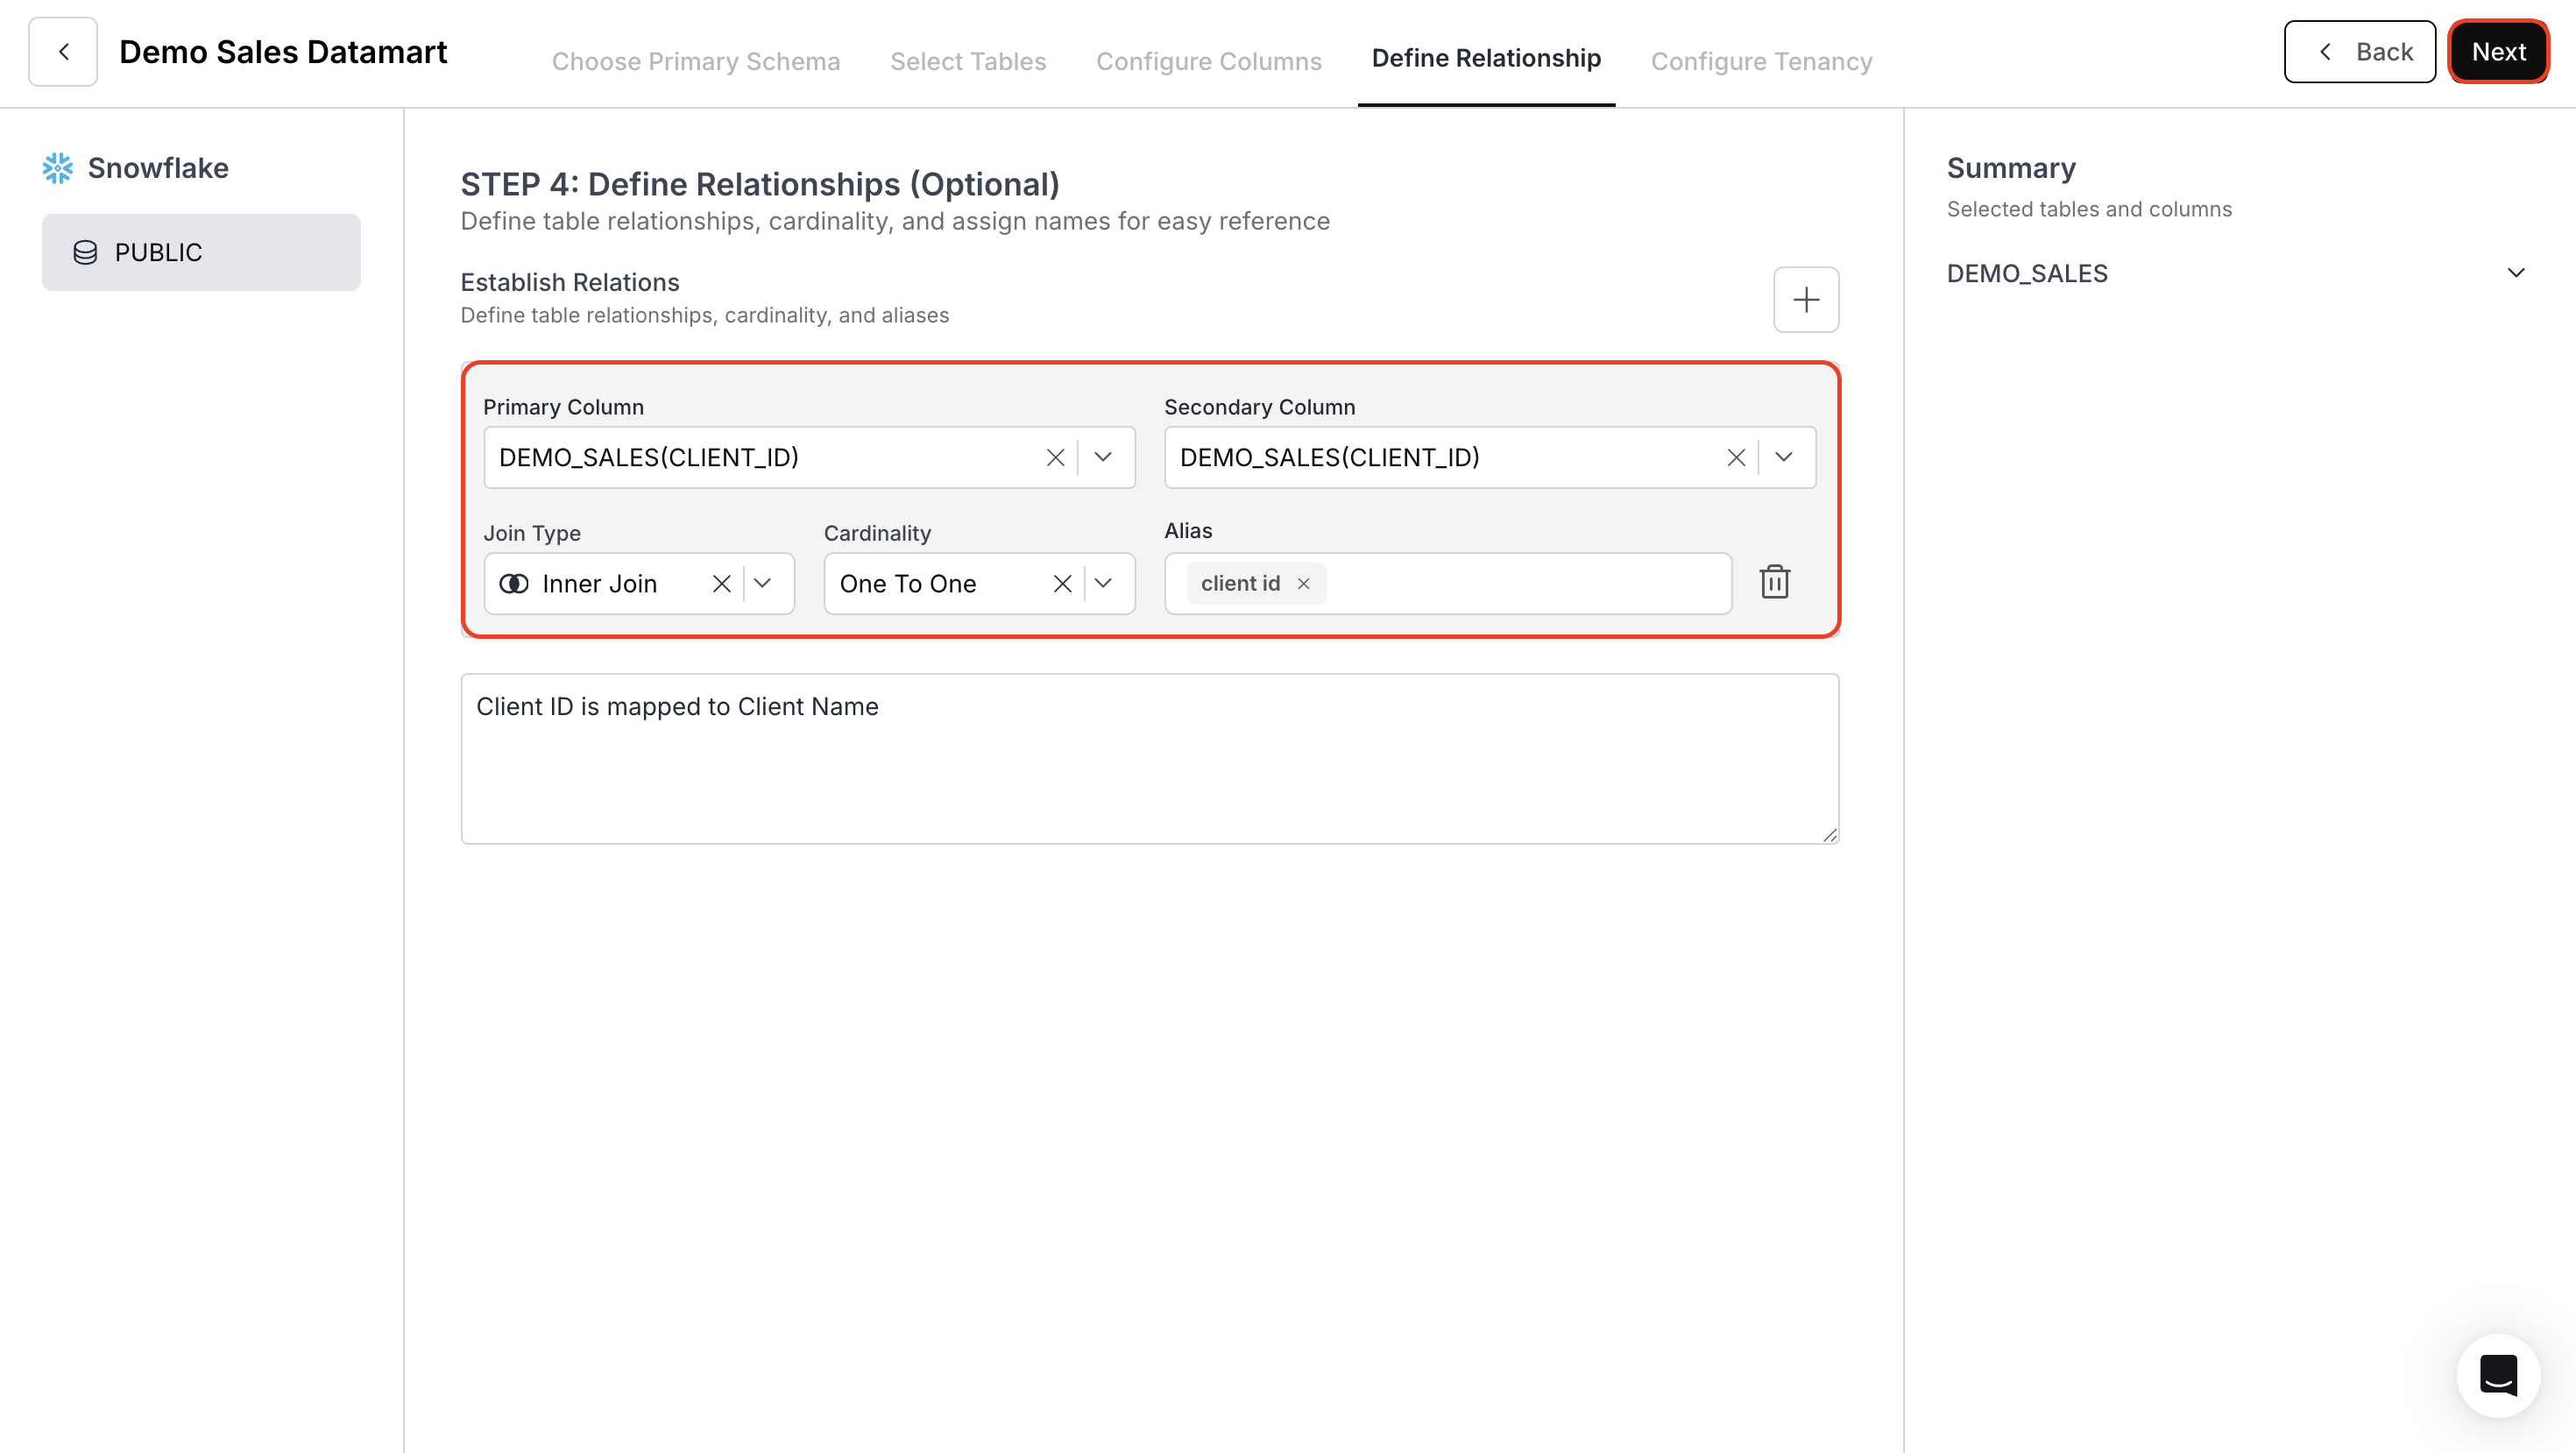
Define Relationships
- Navigate to the Define Relationships tab and describe the relationships between the columns and cardinality between the tables.
- Then, specify any other relevant information or important constraints.
- Click on Next.